DIY Van Transformation: Applying Raptor Paint for a Durable Finish
Mastering the Art of Van Transformation: A Deep Dive into Raptor Paint Application
Embarking on a DIY van transformation is a journey filled with challenges, learning experiences, and ultimately, immense satisfaction. The video “DIY Van TRANSFORMATION With Raptor Paint” by Urban Vanlife provides a comprehensive look into the meticulous process of transforming a van, with a special focus on repairing a leaky roof and applying a durable coat of Raptor liner paint. This project is not just about aesthetics; it’s about enhancing the longevity and resilience of the vehicle against the elements, a crucial aspect for any van lifer. The video meticulously documents the journey, offering valuable insights for anyone considering a similar project. The creators take us through each step, from the initial problem identification to the final preparation stages before painting, sharing their struggles and triumphs along the way. This detailed account serves as a practical guide, highlighting the importance of thorough preparation and the right materials for a successful outcome.
The Catalyst for Change: Addressing the Dreaded Roof Leak
The transformation begins with a common yet critical problem for many van owners: a roof leak. A leaking roof can lead to significant water damage, mold growth, and structural issues, making it a top priority to address. The creators of the video decide to tackle this issue head-on by stripping the entire roof of all its components. This includes the solar panels, which they plan to upgrade, the roof rack, and the awning. This initial step, described as an “all-day job,” is crucial for identifying the source of the leak and ensuring a permanent fix. By removing everything, they gain full access to the roof’s surface, allowing for a thorough inspection and repair. This part of the process underscores the importance of not taking shortcuts when it comes to water damage. A superficial fix might seem easier, but it often leads to recurring problems down the line. The decision to upgrade the solar panels at the same time is a smart move, as it combines two major projects into one, saving time and effort in the long run.
The Foundation of a Flawless Finish: Meticulous Preparation
With the roof stripped bare, the real work of preparation begins. This is arguably the most critical stage of the entire project, as the quality of the paint job depends heavily on how well the surface is prepared. The video breaks down the preparation process into several key steps. First, any holes are filled to create a smooth and even surface. Then, the entire roof is scuffed with sandpaper. This process, known as keying the surface, creates microscopic scratches that help the new paint adhere properly. Without this step, the paint could easily peel or chip off over time. The second day of preparation involves an even more intensive cleaning and scouring process. The creators focus on removing any remaining shininess and grime, ensuring that the Raptor paint will have a perfect surface to bond with. This is followed by a thorough degreasing of the entire roof. Grease and oil are the enemies of a good paint job, as they can prevent the paint from sticking to the surface. The meticulous attention to detail during this stage is a testament to the creators’ commitment to quality. They understand that a durable and long-lasting finish can only be achieved through painstaking preparation.
The Transformation Takes Shape: Applying the Raptor Liner
After two days of intense preparation, the moment of truth arrives: the application of the Raptor liner. The creators use a honeycomb roller to apply the paint, a choice that proves to be highly effective. The first coat of Raptor liner goes on smoothly, and the results are immediately impressive. The textured finish of the Raptor paint not only looks great but also provides a tough, durable, and protective layer. The success of the roof application inspires the creators to take their project a step further and paint the entire van with Raptor liner. This decision marks a significant expansion of the project’s scope, but the stunning results on the roof give them the confidence to proceed. The video captures their excitement and satisfaction as they see their vision coming to life. The choice of Raptor liner is a key element of this transformation. This type of paint is known for its exceptional durability, resistance to scratches, and protection against rust and corrosion, making it an ideal choice for a vehicle that will be exposed to the rigors of the road and the elements.
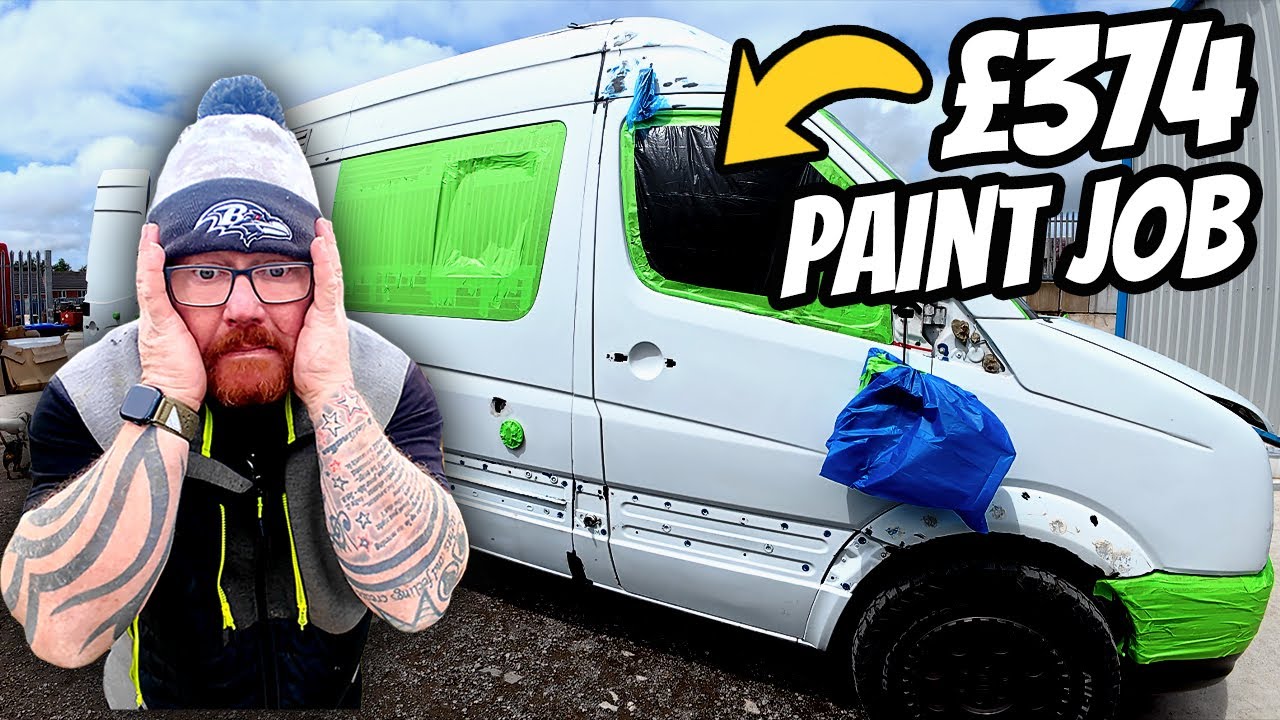
Going All In: Prepping the Entire Van for a Full Raptor Coat
The decision to paint the entire van necessitates another round of extensive preparation. This time, the creators have to strip down the entire vehicle, removing all the side trims, front lights, cameras, sun visors, grills, snorkel, mule rack, and rear badge and step. This “big strip down” is a massive undertaking, but it’s essential for achieving a professional-looking finish. Every component that is not going to be painted must be removed to ensure clean paint lines and complete coverage. This stage of the project also reveals some hidden issues, such as rotten areas under the side panels. This discovery highlights the importance of a thorough inspection during the preparation phase, as it provides an opportunity to address any underlying problems before they get worse. The creators tackle these challenges with determination, removing all rust down to the bare metal and treating it to prevent recurrence. The process of removing an old awning rail with brute force is a testament to their perseverance and problem-solving skills. This part of the video serves as a reminder that DIY projects often come with unexpected hurdles, but with the right mindset and a willingness to put in the hard work, these challenges can be overcome.
FAQ Section
What was the main problem that initiated the van transformation?
The main problem was a leak on the van's roof, which prompted the decision to strip the roof and apply a new coat of paint.
What type of paint was used for the van transformation?
The creators used Raptor liner paint, known for its durability and textured finish.
What were the key steps in preparing the van for painting?
The key preparation steps included stripping all components from the roof and body, cleaning and degreasing the surfaces, filling holes, scuffing the surface with sandpaper, and removing any rust.
What tools were used to apply the Raptor liner?
The video shows the use of a honeycomb roller to apply the Raptor liner.
Did the creators encounter any unexpected challenges during the project?
Yes, they discovered rotten areas under the side panels and had to use brute force to remove an old awning rail.